(b) room 1706, 17th floor, b building, 242 tianhe square, tianhu road, guangzhou;
808th floor, 8th floor, tien ha road, 228th street, guangzhou city;
We've got 337 on the third floor of the may flower mall at 68 nakayama
Appointments: 4006116698
Many people in their daily lives need computers, which take too long, and they often have problems of one kind or another. Today's topic we're sharing is the solution of showing white strips in the top right corner of the computer, which is a common computer problem and is quickly being collected for occasional needs。
The situation is as follows:
The mainframe is open and both the signal light and the power fan are in use, but the monitor shows only a white line in the upper left corner。
Applies to win7 entry advanced start-up options。
When restarting, press the f8 key to see if you can enter the security mode to select the final startup configuration and see if you can access the system。
Rebooting the computer and pressing f8 fast until the advanced start options are released:
Ii. Press delete or space at fast points on start-up or restart, until the window below pops up
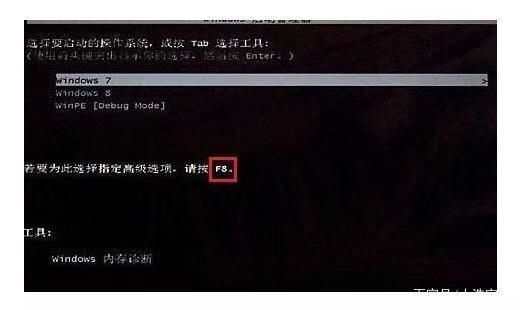
Press f8 to enter the advanced start options。
Win8/win10 goes to advanced start-up options。
Method i: rough law
1. Forced closure and re-opening of the windows logo when it is on, displaying the windows logo once again, and repeated access to the windows advanced option interface three times when it is on。
Method ii: softness
1. Click on the start menu in the win10 system to hold down the shift key on the keyboard and then click on the power -- restart button, and then you can enter the advanced option once restarted。
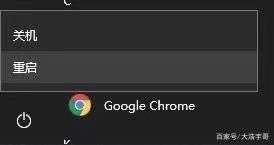
Methodology iii: regular law
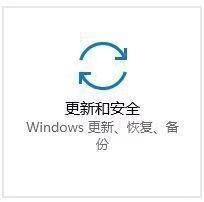
1. Press windows+i to open the windows settings, move the bottom and click [update and secure];
2. Click the recovery button on the left;
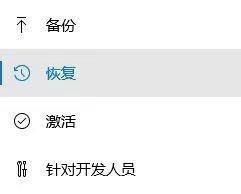
3. Click to restart immediately below the right to start the advanced option。
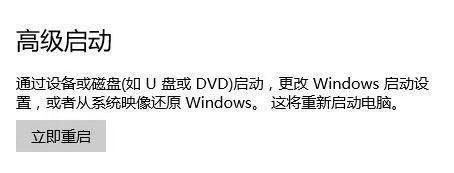
The three ways in which the windows 10 system enters advanced options are presented here. The above-mentioned methods apply to the win10 system in a variety of situations, using method i, method ii or method iii if it is not operational!
If you are unable to enter, you need to insert the main host's usb plugin with the created disk starter, and select the drive priority on the bioos page. By entering the pe, it is possible at this point to repair the start-up guide with a corresponding software tool or to take advantage of the opportunity to enter the c disk. Relocation of desktop data away from drive c to prepare for reloading。
Tools needed: created to start a drive. (can search for ways to create a start-up disk)
Inserts the wrong host usb interface with the disk that has been ready for startup, restarts the wrong host, and selects the drive first in the bioos interface。
The basic software now completes a one-key flash drive, so the method meets most of it, although some of the unrecognised still need to be moved manually。
Pe-system approach
When a computer image appears, you click on the drive-start shortcut continuously, and then select the disk you are currently using to enter the ucd pe interface. (e. G., zhue zhuong fast start buttons: f8, which can be activated with a continuous click on the f8 button to select the u-disk type when the screen appears)
Turn on and guide the repairs
Access to the pe interface, option 2, option 3, is available to all in the pe system。
2. Double-click on the partition tool diskgenius or fix the system guide after entering the desktop of the system。
3. After opening the main interface of the diskgenius partition tool, select the " hard drive" item in the menu. Click to open the drop-down menu。
4. In the "hard drive" drop-down menu, select the "rebuild master guide record mbr" item, click and automatically restore the master guide record, and in a few seconds it will be completed, the program will be closed, the pa system will be shut down, the computer will be restarted, and the system will be activated。
5. The recovery system guide tool uses the method of double-clicking the recovery system guide icon on the desktop with the left mouse button to open the tool page. Then select the steering disc that needs to be repaired. On the tool information page, by hint, we press " 1 " on the keyboard to give a command to start repairing the system:
6. We just have to wait patiently for the system repair operation to be completed:
7 upon completion of the restoration, the system produces a recovery report that appears on the page, in which we can see a hint of success:
8. Re-launch the computer to see if it can access the system, and if it is still unable to access the system, only reload the system, so that the re-loading system tutorial can search for the re-load system method。
Finally
If you have more computer problems that you don't understand, the important role of app can be demonstrated when the computer fails to operate。