I. Description of failure phenomena and rationale
Typical failure
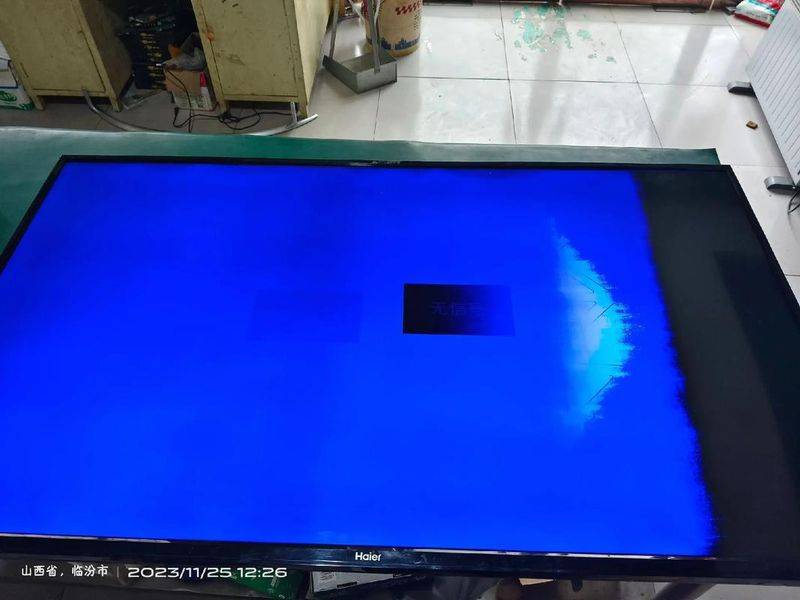
1. Acoustic, unimaged, with dark-state images visible on the tilt screen of the flashlight
2. The screen is partially dark, half bright, half bright, and black screens
3. Backlight protection: switching to three to five seconds will be extinguished and the light is normal。
Rationale
Led backlights provide a source of light for the lcd panel, and light bead openings/short circuits trigger the protection of the heliboard, resulting in a black screen, which is a hair 55-inch high hair failure。
Ii. Required tools and materials
Tools
Cross screwdriver (ph1/ph2), inner hexagonal set load
Plastic sled rods, shredder cards (shaving-proof shells)
3. Massive meters (direct current voltage)
Led backlighter/tester
5. Pro-static bracelets/mittens, insulation and..
Soft cloths, foam cushions (screen protection)
Materials
1. Hale 55-inch original matching lamps (procurement by screen/lightbar type, e. G. Led55d8-zc14-05)
2. High-conductor thermal double-sided glue (original plant specifications)
3. Steering silicon resin (optional, upscaling)
Scrapboxes
Key requirements
- the lamps shall be of the same type, number of beads, same voltage, and shall be replaced in whole groups and shall not be replaced by separate beads
- prohibition of the use of high-simulator plasters, which can easily be burned again。
Iii. Precision detection methods for backlight damage
Method 1: flash start of flashlight
Plays the adjoining sound and closes the screen with a flashlight:
- can see the dark image of the back light failing
- no screen check main/screen logic board。
Method 2: dismantling machine voltage detection (determination lamps/relationboard)
1. 30 minutes of electrostatic disassembly, disassembly the shell, and find the back-lighter
2. Found a light-column power supply plugin, which operates to measure output voltage:
- voltage jump: quick drop-back light damage, protection of movement, 100 – 180 v
- the voltage stabilizes the non-output plume failure
- high empty voltage with zero light beads。
Method 3: accurate positioning of lighters (prescriptively required)
1. Pulling out of liner lines and putting the lighter out for the light interface
2. On-board testing:
- non-lighting/scintillation damage
- it's a full-blown flowboard problem。
- conclusion: hale 55 inches and 90 per cent of the lights are ageing and the non-heavy flowboard is malfunctioning。
Standard steps for dismantling and replacement
Step 1: prior security
- the extraction of power plugs and 30 minutes of static discharge of residual power
- the screen is covered with a soft cloth/foam down and the face is strictly forbidden。
Step 2: dismantling the shell and internal wire beams
1. Crushing of all fixed screws of the backboard (distinguishing of length screws, subordination records)
2. Pulling down: power plate lines, main panel screen lines, horn lines, backlight plugs
Remove the shell and place it secure。
Step 3: dismantling front frames and liquid crystal screens (most critical)
1. Crushing of the screws around the front frame and the slow opening of the card button with a crowbar along the border
2. In cooperation with the two persons, the pyre lifts the liquid crystal screen and places it on a mattress, which is strictly forbidden to bend, squeeze and touch the lined gold finger
3. Removed in turn: dispersive membrane, brightening membrane, guidance panels (lightly carried, folding marks, fingerprints)。
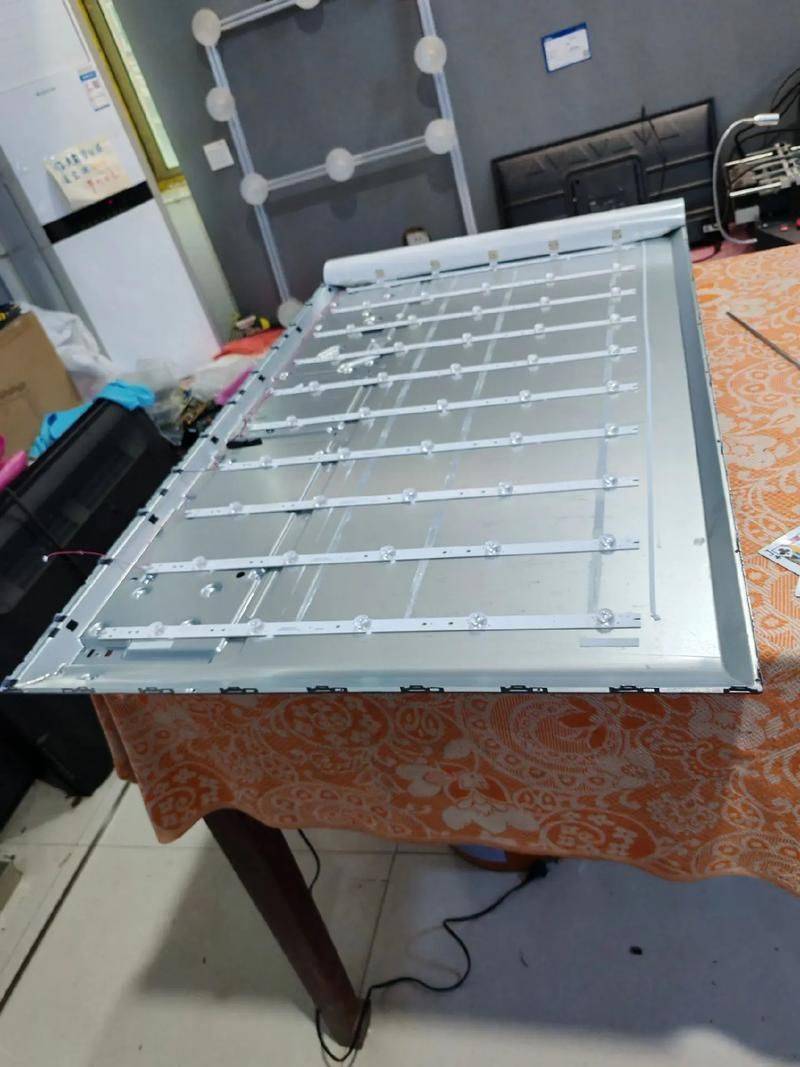
Step 4: dismantling old lights
1. Straight-down: a light bar placed on a metal backboard, torn by a fixed screw, torn by a conductive thermal glue, and tore down the connector
Side entry: the lamps are in aluminum slot in a frame, decorated, drawn, removed
3. Remove all the old lamps and clean up the backboard and keep them clean。
Step 5: install new lights
1. New lamps with high-conductor thermal double-sided glue, which is directed to the original screw hole
2. Placing of light lined lines to ensure positive and negative extremes and anti-dome mouths and not reverses
The screws are equally locked, and the lamps and backboards are fully aligned and unargued。
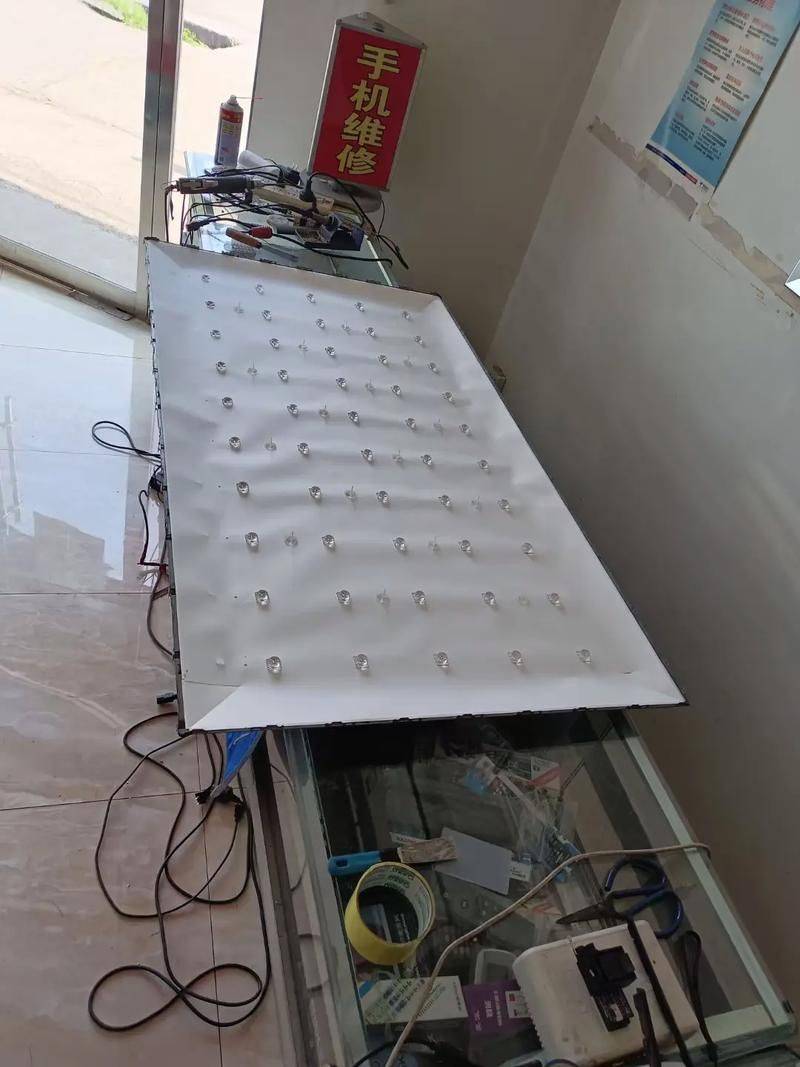
Step 6: naked machine tests (without screens)
1. Connecting backlight plugs, short-linking piloting, electrical testing
2. Observation of all bells: flat, non-dark and non-scintillated
3. Test time of three minutes to avoid overheating。
Step 7: reload optical components and screens
1. Release back in original order: the guidance plate diffusing the diaphragm to increase the brightness of the membrane (direction of the film, non-correctional rembrane)
2. The return of two persons to the tablet crystal screen, with a prefix and a lock screw
3. Insert all wire beams to check that they are missing and not squeezed。
Step 8: reloading and finalization
1. Reload the shell and lock the screw to its original position
Electro-starter: normal, smooth and non-scintillated repair of the image completed
3. Enter the plant mode/set to shift back light to 80% to extend life。
V. Maintenance core attention (observation)
1. Safety first: power outage, high voltage, static
2. Screen taboos: single person does not lift 55 inches of screen, does not press the corner of the screen and does not fold the screen
3. Lightmark principle: the whole group is replaced with no single broken beads to avoid further burning of old and new
4. Rubber and dissipation: the two-faced glue that should be used to ensure the dissipation of the heat and to eliminate the bright spots
5. Spectrum protection: optical membrane, fingerprintless, non-refuscated or otherwise dichotomy and water wavering
6. Screw management: long screw partition, long screw locked deep enough to break the screen
7. No-over-time test: nudity lights do not exceed three minutes to prevent overheating
8. Recommendation for warranty: retain the light strip model after replacement to facilitate subsequent maintenance。
Vi. Common issues and treatment
1. The turn-off remains to protect the mismatch/detailing/dark beads
2. A lighted lamp bar with no tight backboard
3. Optical membrane retrofitting/repeated marks with uneven brightness
4. Repeated damage to placards, heat dissipation and failure to replace groups。