

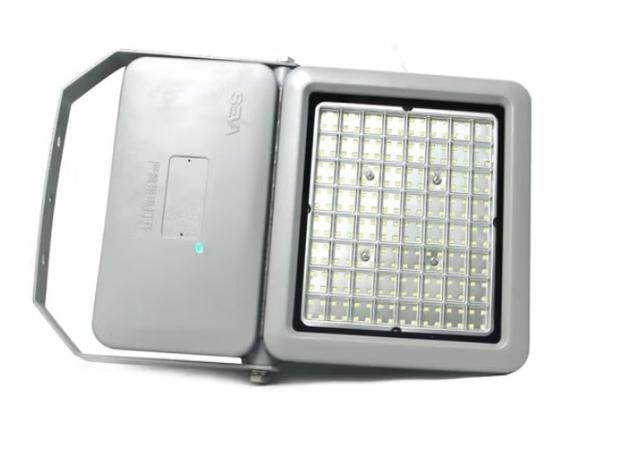
Guidance for the installation of szsw 7180 flashlights contains complete steps and attention from preparation to eventual commissioning。
Step 1: safety first
Power outage: ensure that the power at the installation location is completely shut down before starting any connection work. It would be preferable to lock and place a “prohibited gate” warning sign on the distribution box。
Security equipment: if the location of the installation is high, use a solid man ladder or scaffolding and ensure assistance from others。
(b) ensure that the power lines reserved are not exposed or damaged。
2. Inventory of tools and materials
Essential tools: screwdrivers (cruising the mouth of peace), electric pliers, wiring pliers, electric pens, electric drills (if required), wrenchs。
Material requirements: pan-lights with support frames, associated screws/inflated bolts (usually attached to lamps), waterproof wire boxes (recommended for use if the outdoor environment is bad), electrical wires (if not long enough), waterproof tape, cable fixed bands。
3. Inspection of lamps
When the boxes were opened, a careful check was made to see whether the flashlights and the frame were damaged。
Check product specifications for information on maximum power, wiring, ip protection levels (to ensure suitability for outdoor use, e. G. Ip65)。
Step 2: installation steps
The installation of a panorama with a frame is divided into two main parts: a fixed frame and a wire。
Part a: fixed racks
The racks are usually installed in a variety of ways, most commonly in wall-mounted form。
Determine installation location:
Select the best position to light up the target area and ensure that the undersea of the frame is closely aligned to the wall (or columns, etc.)。
Avoid vents, pipes or other barriers that may affect installation or use。
Consider the direction of power lines to ensure easy connectivity。
Marked drilling points:
The base of the frame is held tight on the selected wall to ensure its horizontal status。
The location of the drill is marked on the wall with a pencil or marker pen through the installation hole on the base of the frame。
Drilling and fixation:
Select the right drill to drill in accordance with the markings and the specifications of the swelling bolts used. The drilling depth should be slightly longer than the length of the swelling bolt。
(b) plug the swelling bolt into the hole and then point the base of the frame at the screwdriver or wrench to the screwdriver to make sure that it is firmly anchored on the wall。
Part b: connection
This is the most critical and safe step。
Open the hood:
The waterproof wire box on the back of the flashlight was found and the lid was wrigged with a screwdriver。
Identification of wires:
A flashlight usually leads to three lines:
Firelines (l) - usually brown or black
& zero - usually blue
Submarine (e) - usually yellow and green line
Power end: the power lines drawn from the pre-positioned or wired boxes of the wall shall also be three, and the colour shall correspond to the above。
Connecting wires:
Follow the "colour to color" principle:
Put the power-fired wires into the light-fired wires。
Put the power zero line on the light zero line。
The power lines are connected to the lights。
Connection method:
This is the safest and most expeditious way to insert a wire that has been stripped directly into the corresponding endhole。
A spiral wire connector (wire connections) can also be used, but it is important to ensure that the connection is close and insulated。
Waterproofing (critical!):
When connected, half-fold entanglement from the bottom up (reverse to the current) with a hydraulic tape ensures full coverage of the metal parts and parts of the insulation skin。
If the lamps are fitted with their own rubber seals, ensure that they are flatly pressed to the edge of the connector box。
Other organiser
The connected wires are carefully plugged back into the connector box to avoid crushing。
Cover carefully the waterproof covers of the connector box and tighten all screws to ensure sealability。
Part c: installation and stationary lamps
Installation of lamps on the rack:
The u-shaped card or fixed hole at the bottom of the flashlight is directed to the arm of the frame。
Initial fixation and angle adjustment:
Usually, one or more screws will be used on the rack for fixing and adjusting angles. Let's not completely screw up and leave some room for movement to adjust the light。
Align lamps to the best light angle required。
Final hardening:
Once the angle is adjusted to satisfaction, all the adjustments screws are completely tightened with a wrench or screwdriver to ensure that the lamps are not loose or down in the rain。
Step 3: electronization and final inspection
Final inspection: check once again whether all screws are sharpened, whether the wires are properly collected and whether the trunks are sealed。
Electronization test: to connect the distribution tank with the power switch。
Observation effects: open the switch and test if the flashlight is working. Observe whether the angle and extent of its exposure is in line with expectations。
Altitude: if necessary, the last angle can be fine-tuned after power cuts。
Collapse cables: use cable bands to fix external power lines and avoid disorder。
Installation of szsw 7180 critical attention
If you are not familiar with electrician operations, or if local regulations require you to hire a professional electrician for installation. It's safe。
(b) ensure that the wall is equipped with sufficient load capacity to support the weight of lamps and support frames。
Waterproofing is the lifeline: when installed outdoors, the waterproofing of wires is key to the life and safety of the lamps and must not be discouraged。
Avoid direct vision: the flashlight is very high and should be installed and debugged so as not to look directly at the light face so as not to damage the eye。
(b) ensuring that there is sufficient space around the lamps to disperse the heat and not to be installed in closed or close to flammable materials。
Following the above guidelines, you can safely and correctly install the light with the frame. Good luck with your installation