

The smooth exit of the perimeter after parking is a problem for many new drivers. When he was ready to leave, he was busy with his hands and feet — turning left on the steering wheel, with his head stomping to the front bumper; while there was room in the rear-view mirror, his body was stuck in the spot. Today we are here to dismantle every move from the side of the library, in a manner that gives you a complete understanding of the “gold angle” of the wheel and the “key point” of the sight。
Step 1: the “basic posture” before the release
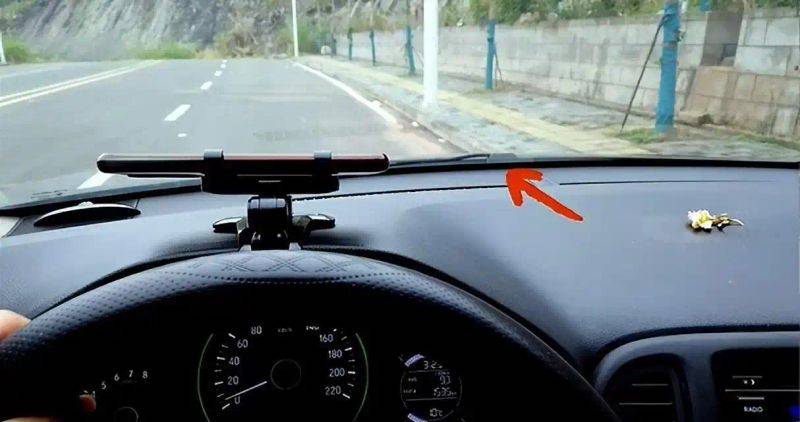
Imagine, you just finished a perfect side stop, parallel to the hangar line, even between right and left. At this point, do not press the gas, but do three things: keep the wheel straight, turn the left on the light, and adjust the seat height. In particular, the height of the seat, which many newcomers ignored, resulted in the line of view being blocked by the steering wheel, with no indication of the location of the rain scratcher's high point or front windshield。
A real case in point: when the student first practiced to get out of the garage, he mistook the root of the rain scratcher for a high point, causing the steering wheel to be half an hour early and almost scratched the head to the next parked electric bottler. The coach then told him to move the seat up to “a third of the top of the hood” and the problem was solved immediately。
Method i: rain scraper three point positioning
This is the most commonly used hangar technique of the school and is appropriate for the availability of space before and after the spaces。
Action breakdown:
1. Commencement of preparations
- hang the d block and light the light with your left hand
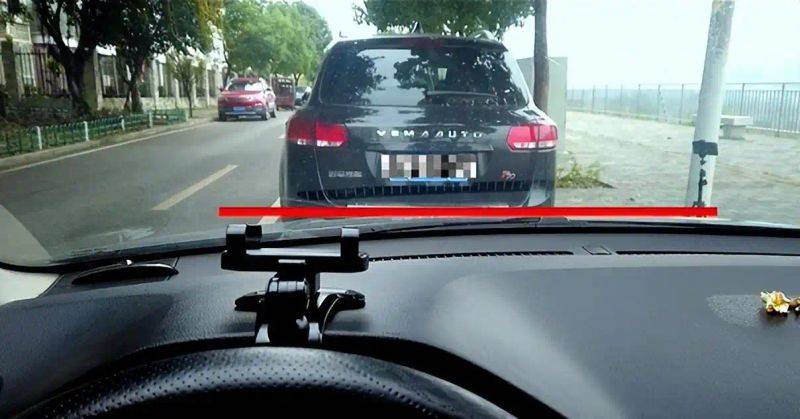
- keep your eyes on the lower right corner of the front windshield
2. First direction: precise access
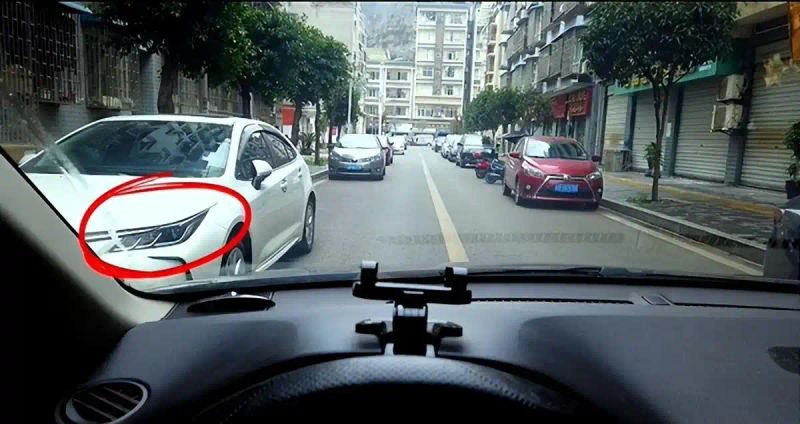
- move slowly, when the bottom right corner of the glass intersects with the left side (line a) (e. G., figure 1) return to the right wheel
- key details: it's time to slow down! It's time for the brain to react
3. Second orientation: widening the turn radius
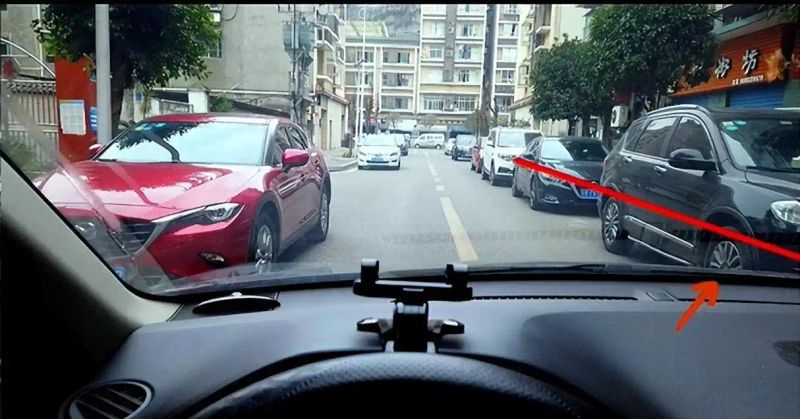
- keep moving, look to the rain-shaving high point
- when this point overlaps with the right side of the line (as in figure 2), the wheel turns right
- frequent error correction: a lot of people are hitting the direction here, and a round of them actually makes the head draw a smooth arc
4. End-of-service adjustment: straight back
- watch the right rear view mirror and return to the right wheel as the car is parallel to the road
- and then you'll be surprised to see that the whole body is steady and the locals are out of the parking lot
Method ii: back-wheel "pressed line back"
A more flexible “back-to-back approach” is required if the space in front of the spaces is narrow, such as the closeness of the previous vehicle。
Action breakdown:
1. Back-up creation of space
- let's get r up and down. Keep your eye on the left and back
- security alert: make sure you have no pedestrians or vehicles in the back of the car
“secret distance” between wheel and line
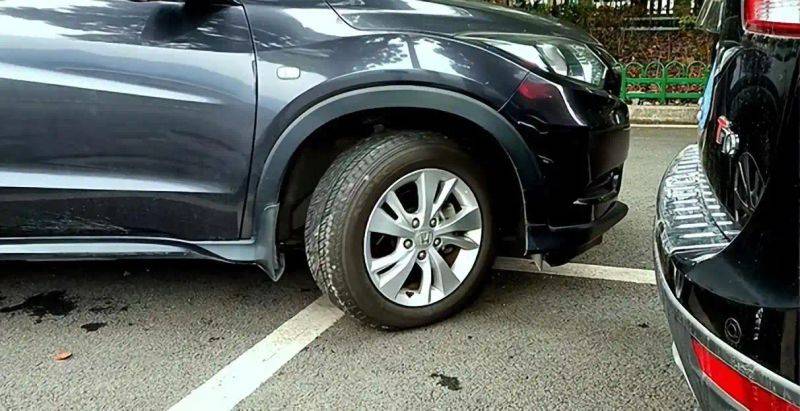
- when the rear left wheel is down to the margin of the library (e. G. Chart 3), stop immediately and return to the right wheel
- progress technique: if the ground is free, the front door handle can be used as a reference - stop when the front end of the doorknob is flattened with kuang
3. Full left direction
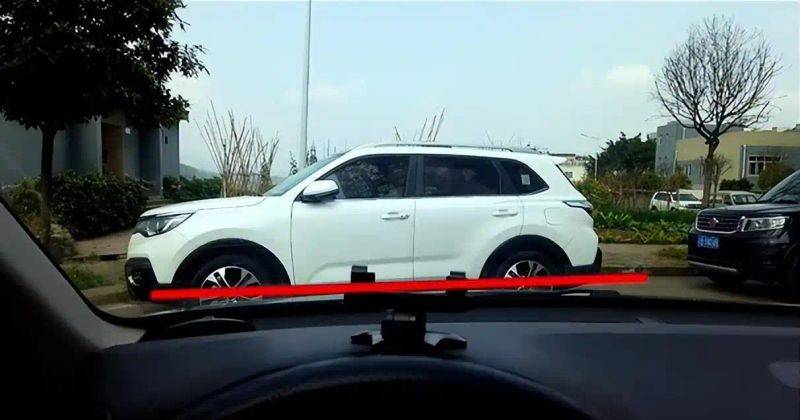
- hang a d block, full left on the wheel, and get the head out to the maximum
- maximum position determination: stop until the front of the hood is completely covered (or the front plate cannot be seen)
4. Second reverse adjustment angle
- r block again, wheel to the right
- maintaining at least 30 centimetres of safety space by observing the back of the vehicle through the right rear vision mirror
5. Last direction to escape
- reset the d block to the left. This time, you'll find the head easily avoided the front car and made it out
A guide to hole avoidance: 3 common mistakes by freshmen
Misunderstanding of “killing in the direction”
- the steering wheel is full of violence. The right thing is to move at the same speed
“deceptive” of the rear-view mirror
- case: when the trainee wang was out of the garage, the rear-vision mirror showed that the tail was half a metre from the back of the car and that the actual exit was only 20 cm. It's because there's a blind spot in the rearview mirror
3. Turning the light back to the trap automatically
- a lot of cars will automatically turn off the switchlight when they turn back
Quick master with a three-step exercise
Static simulations
Stop and shut down the fire, and practice the hand and rhythm in the direction, creating muscle memory
2. Site marking training
Simulation of pre- and post-mining vehicles with mineral water bottles, drawing edges on the ground with chalk to reduce actual fighting tension sensor
3. Real-life navigation companion exercises
Please stand outside and focus on the front/back limits and create a sense of space
With these skills, you'll find that the side exits like playing the snake game -- every change of direction leads the car out of a perfect trajectory. And finally, you're going to say, "the direction is not from luck, it's from the eyes." and you're going to be a lot of observation, practice, and you're going to be a lot more of a "maestro."