What about the laptop monitor
As it technology continues to develop and progress, and products are updated, more and more notebooks are being eliminated. But can we use these old notebooks? The answer is yes. Today, you are taught to make full use of the liquid crystal screen of the used notebooks so that it can play the "sunlight". But only if these removed liquid crystal screens are good。
Step 1: preparation of materials
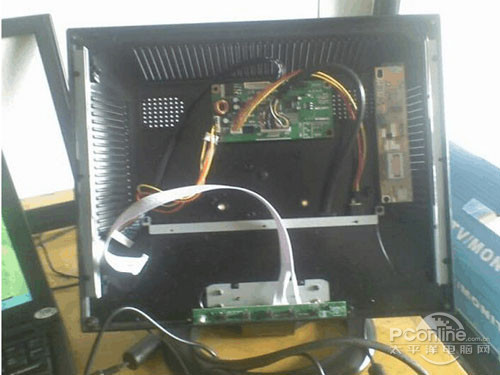
Material requirements: dismantling of a piece of a laptop liquid crystal screen (the liquid crystal screen model is typically on its back, when it is clearly outside when it is removed, you simply need to write down the model, just say the model with the store when buying the package), modify the package (including the shell, high pressure plate, drive panel, power adaptor), burner (hardware tool for the brushing process) and one (one male and one female) and usb switch line (for the burner)。
Step 2: write the corresponding driver for the signal drive (commonly known as screens)
It is important to note that each liquid crystal screen is produced with the corresponding model and each model with the corresponding driver. Only the type and drive panel of the lcd screen shall determine which driver the lcd screen needs and then write the corresponding driver into the signal panel. Signal plate model judgement: look at the chip。
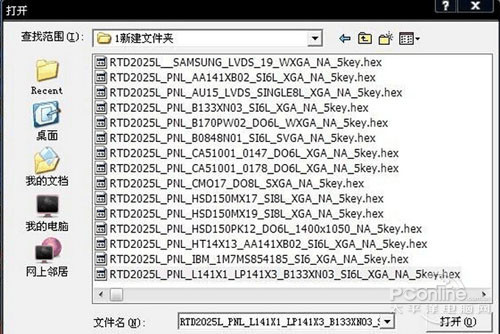
The method of determining drivers: for example, using the lg lp 133x7 (a2) in this paper, with a resolution of 1024*768, a procedure of 1024*768 is found, and then the interface of re-mass screens is defined as an electrical resistance of about 100 euros per group of signals, a total of four groups, which is a single six, and you are looking for a si6l program, or a single six, which is basically certain. Just write it in and try it on. The driver name of this liquid crystal screen is: rtd2025l pnl l141x1 lp141x3 b133xn03 tx31d70vc1cab si6l xga na 5key. Hex
The following official openings began:
First connecting line: insert a parallel, monitor vga plugin, usb power interface into the burner. A printer interface is attached to the computer at the other end of the intersection (provided that the computer must have this printer interface and has tried to use it, but has not succeeded), and usb is plugged in the computer's usb interface to power the burner. As shown in the figure:
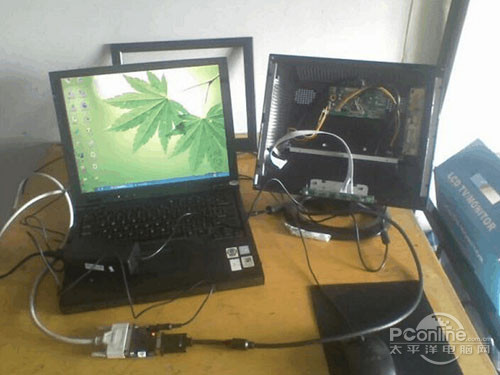
Connected overall effect chart
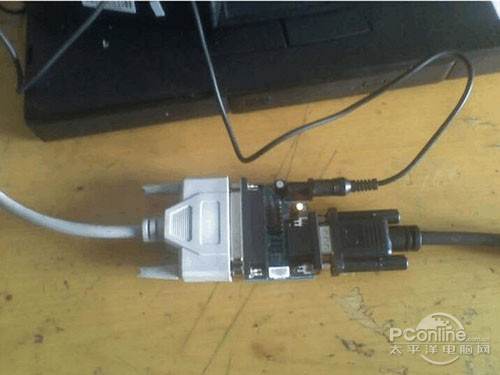
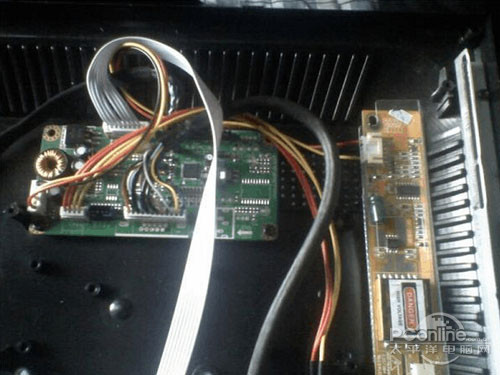
Recent photos of burner connections
The red dot in the picture is the power signal for the burner. First, an agreement must be installed: port95nt. Exe, like the tcp/ip agreement。
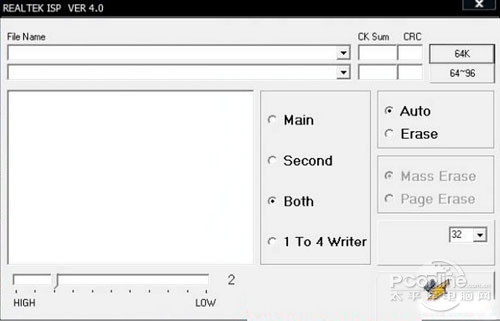
Second, running upgrade installation tool: rtdtool. As shown in the figure:
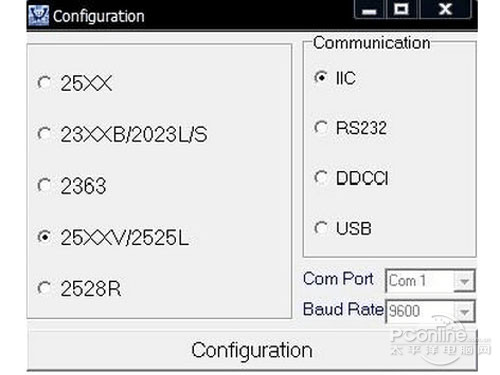
Clicking on configuration shows the following picture, and this step has to be done, or you won't be able to do it。
Select the image of head showing
(tips: this step must be taken in the course of the upgrade, otherwise the painting will fail)。
Close this window, click, rtd2120isp
Select the appropriate driver for the lcd screen。
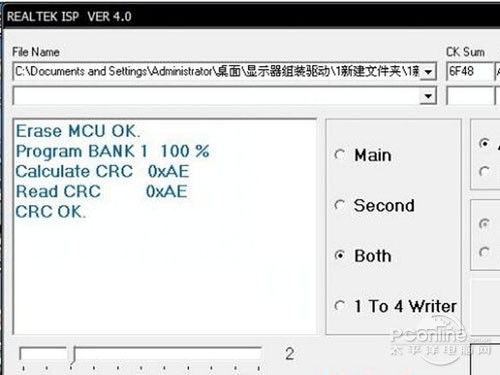
Start burning
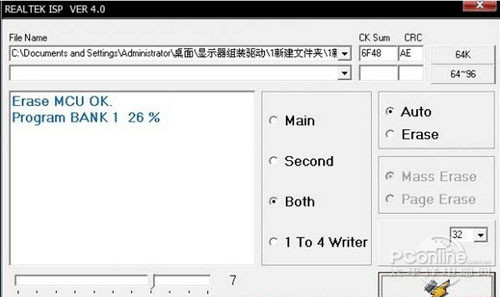
Burning complete
Step 3: installation of liquid crystal screens
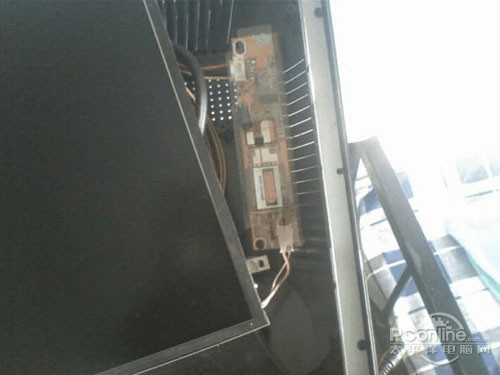
At this point, the signal lines of the lcd screen and the high-voltage power lines are connected to the painted panel and the computer is shut down, and the vga plug-in of this monitor is inserted into the vga interface of the notebook and is opened。
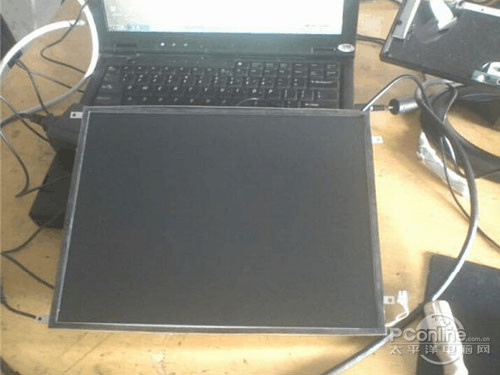
The laptop's liquid crystal screen
Connected (put the power out before wired)

It was suddenly discovered that the line was too short to be installed and that it had been cut off at one time。
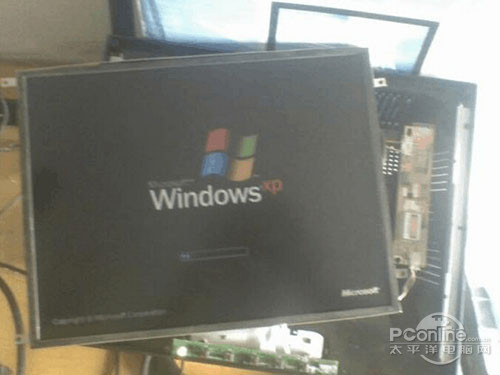
Step 4: tests for normal use。
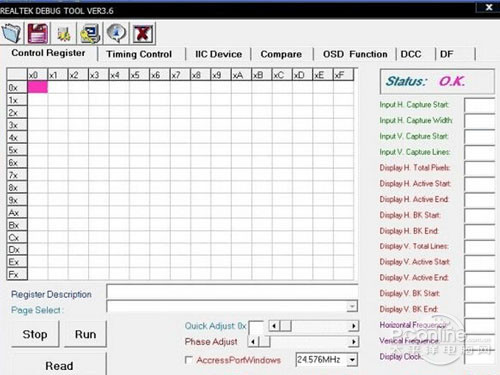
The monitor has been lit, as shown in the figure. On the windows scrollbar。
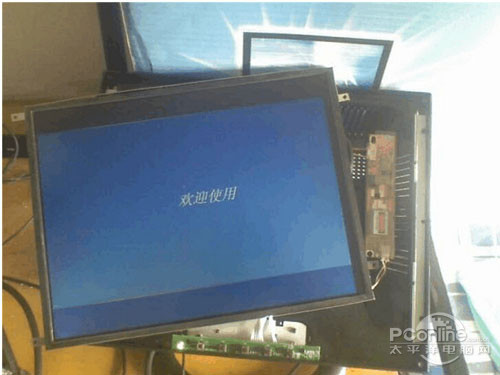
Enter the welcome interface。
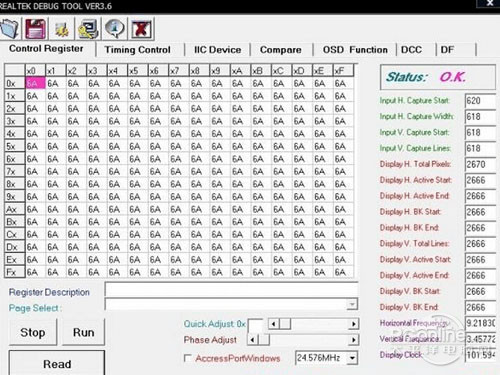
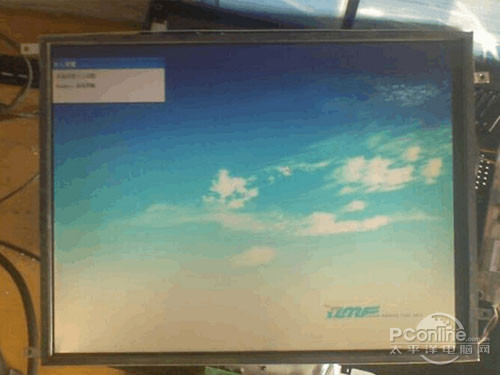
Debug interface。
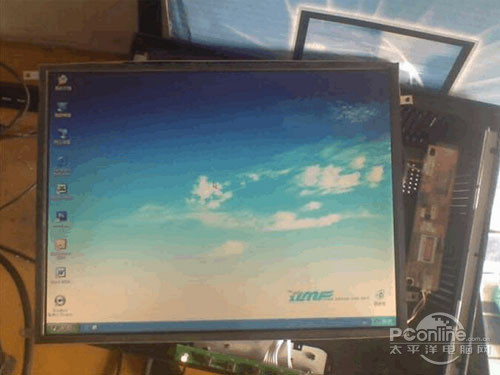
Debugging complete。
Step 5: cut the power, install the liquid crystal screen, and put in a cardboard, cover the shell and screws, and take up the mainframe starter test。