

The xp system can be installed via the disk using this tutorial for notebooks, desktops, web pages and assembled computers。
Step one, first, is to prepare at least a 2-gb disk (preferably 4gb). Then downloads a flash starter (the flash starter tool) to make your flash drive a starter steering disk. Download the address below。
Step two, download a suitable xp sp3 system, recommends download without any castration, drive more fully and basically cover all drivers。
Step three, when download is completed, begins to produce a flash drive, which is preceded by backup of the original disk data, as the production process will format the entire disk. Specific steps are as follows:
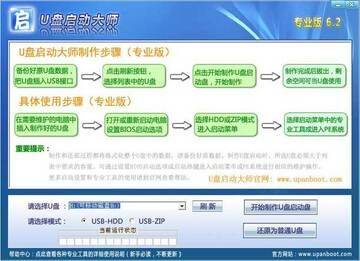
1) discharge “master starter 6. 2 professional edition” and start installation, taking care to remove unnecessary plugs. Then you insert the disk that you want to make, open the master's professional version 6. 2, and select the disk that you want to create in the bottom box. (if you don't have the discs you want, click to refresh them) as shown below:
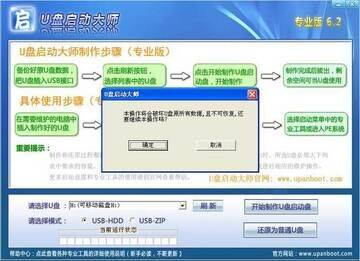
2) clicking on the right " start to make a flash drive " button will see the following hint as to whether you have backed up all the data in the disk. If the data is backed up, click ok. If there's no backup, open my computer and copy the data from the disk to the hard drive. The following is a chart:
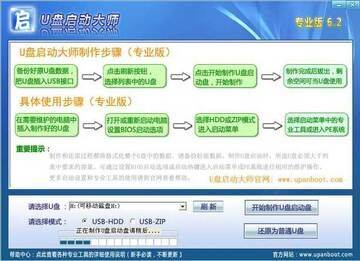
3) starting with the creation of a flash drive, you will see a progress strip under "current state of operation". The following is a chart:
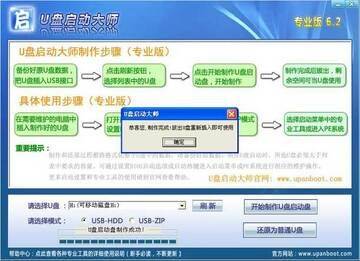
(4) the work is done when the progress is complete, and there's a hint after success, just click ok. This is it. The following is a chart:
Step 4. Upon completion of production, the disk will be removed and re-inserted into the usb interface. The disk can now be used as a normal disk, and the remaining space can still be stored normally, copying the downloaded xp sp3. Gh into the root directory of the disk. As a result, preparation of the ucd system has been completed. The following is a chart:
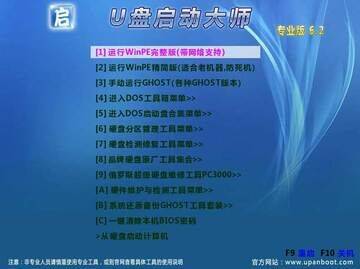
Step five, insert the disk you just made on the computer you need to install the operating system, setting it to start from the disk (not set, click here to see how you set it). Then reboot into the drive startup interface and choose to enter the pe system. The following is a chart:
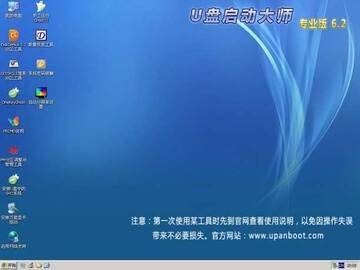
Step vi. The desktop following the entry of the pe system is shown in the figure below:
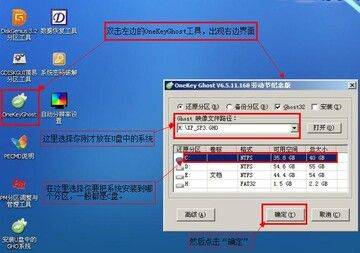
Step six, open the onekeyghost tool, select the "return division (r)" check box above (the default status is selected), then select the xp sp3 system that you previously placed on the disk under the "ghost image path" ; select which partition you want to install the xp system to in the list below. Finally click the confirmation button below. As shown in the figure below:
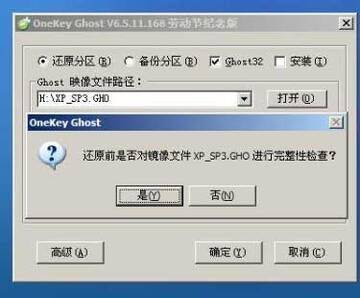
Step 7. After clicking on the above determination, the following prompt window appears to ask if you have a mirror file xp sp3. Gho mirror integrity test, and if you generally choose not. If there is concern that the system is incomplete and half of the system installation fails, the option is yes. Here we choose “no”. The following is a chart:
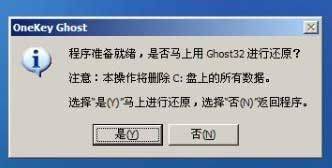
Step 8. After selection no, direct indication is made that the system is ready, whether the system is restored (i. E., installed) and the option is to start installation. The following is a chart:
Step 9, following the above operation, will begin the installation of the system, pending the completion of the progress strip below. The following is a chart:
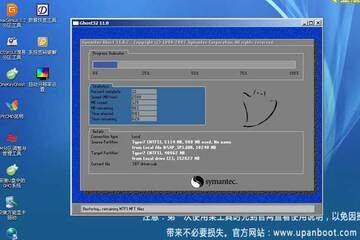
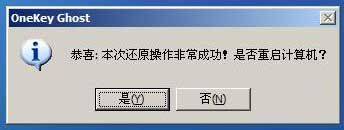
Following step 10, the progress bar is followed by a hint, “this is a very successful return”, asking if you can restart your computer. Select "is" to start restarting. Enter the os installation interface。
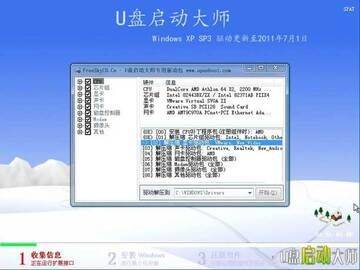
Step 11, after restart, will enter the system's roll-out process. In a minute, you'll see the driver interface below. If you do not need to install a driver or a blue screen after the first installation, click on the " turn off " button to turn this driver installation off, and when the system is complete, then install the driver with a elf or a life drive. In general, the driver of this complete version is complete. It supports the assembly of computers, notebooks and online books. So this interface usually appears, without any concern, just wait and see. The following is a chart:
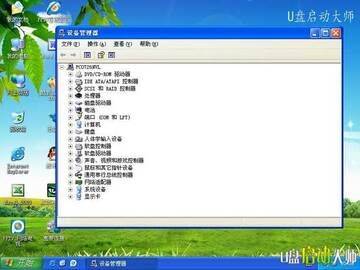
Step 12, once the drive installation is complete, will be automatically re-engineered into your familiar xp interface. According to the device manager, all drivers are installed normally. The following is a chart: