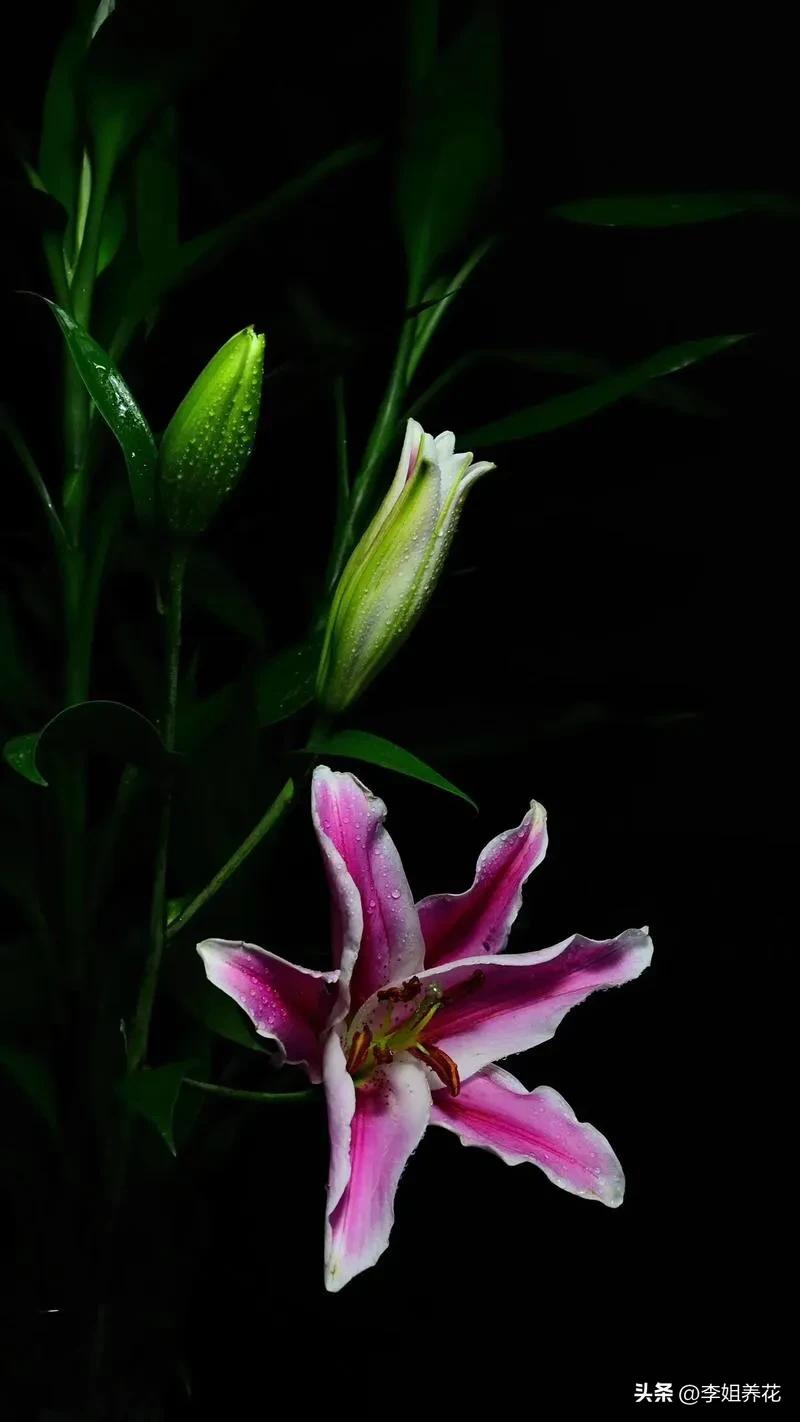
And as lily's charming flowers fade, many of them don't know what to do next. Cut? Can't wait. You don't want to cut it? You don't want to waste nutrition. In fact, the flower is the key to determining lily's fate! At this point, there is only one central goal for conservation — the “breeding ball”. Good job with the game, small ball to big ball, weak ball to strong ball, double the amount of flowers next year

When lily's last flower faded, its stage did not end, but instead moved from a “show on the ground” to a “storage battle” under the ground. The balls are like an energy warehouse, and all the work we do after spending is to fill up and expand it to ensure that the next year will sustain a more spectacular picture of the flower。
Core i: capture the golden feeding period (later yellow)
Remember: don't dig the ball immediately after the flowers have been cut! The leaves and the straws are a “core factory” for light co-operation that produces and transmits nutrients for the balls. Early cutting is tantamount to cutting off the nutritional sources of the balls。
“screeching” in a timely manner:
• operation: after the last flower has fallen, the remaining flower is cut off in time to keep only the bouquet. The aim is to avoid the waste of nutrients on seeds。
• techniques: with clean scissors, cut from 1 to 2 cm above the flower infarction base. It is important to keep as many leaves and rods as possible。

A strong, hard-working fertilizer ball:
• concept: flowering consumes a large amount of nutrients, at a time of fall, the second peak in the growth of the limo, which urgently needs to be supplemented by “lunar fertilizer”。
:: fertilizer selection: the immediate phase-out of high nitrogen fertilizers and a shift to high phosphorus, high potassium fertilizer. For example:
• potassium dihydrophosphate: 1,000 times the water, once a week with a leaf spray and roots, 3-4 consecutive times. It promotes the transport of photocolumn products to the balls and significantly increases the sphere。
• more than 12 or other root-type water solubility: after dilution in proportion to the instructions, instead of water purification。
• duration to natural atrophy: the process of insisting on fertilization until the leaf on the ground begins to turn naturally yellow and wither, usually lasting 1-2 months。
️ core ii: mastering the precision of the "ball-take-off" (deep and yellow)
The local part is completely yellow, which means that underground seed balls have reached hibernation and have stored enough nutrients, which is the best time to dig up the seed。
Timing: better later
• standards: waiting for a completely yellow plant, i. E. A brown, crushing state. At this point, we wait another week or so to find the best。
• rationale: early digging, the seed ball may not yet reach deep hibernation, the skin is tender, and it cannot be stored。
2. Excavation and clean-up: careful thinking
• excavation: choosing clear skies. The shovels are inserted into the soil far from the base of the mantle, slowly loosening the surrounding soil and carefully excavating the whole nest of seed balls together with the mud to avoid the shoveling of the ball。
• clean-up: shivering most of the earth with your hand. For the adhesive mud, one or two days can be laid in a cooler ventilated place, where the soil can be dried up before it is lightly stripped. It is forbidden to wash water so that it does not cause wounds。

3. Cutting and disinfecting: elimination of after-effects
• cutting: cut the dried-out straw from the top of the ball. And cut the dry, rotting root of the bottom。
• sterilization: this is a key step in preventing decay in storage! The calibrated seed ball is fully impregnated in polybacterial or enzyme slurry (in proportion to the instructions) and immersed in 20-30 minutes. Once removed, it must be completely dryed in the cool air (about 1 to 3 days without any tide)。

Core iii: create a perfect storage environment for "ball-off"
The storage chain is the last level that will safeguard the overall growth of the ball. The goal is to allow the seedlings to sleep in a safe and stable environment until next spring。
Storage conditions: cool, dry, dark
Temperature: the desired storage temperature is 2-8°c. Vegetable conservancy in refrigerator freezer (non-frozen!) is an excellent choice. If not, it can be placed in the coolest, unheated corner of the home, such as the backlight of the balcony (ensure that it is not frozen)。
:: humidity: the environment must be dry. Wet through heights is the cause of a bad ball。

2. Storage methods: isolation and buffer
• recommended method: a dried-out seed ball will be buried in a clean, micro-humid river sand, leeches or peat. Note that the medium is “micro-tide” rather than “wet”, and it is appropriate to hold hands in groups and break loose。
• a simple approach: balls can also be placed in a net or in a box containing dry wood or newspaper chips. The key is to ensure air access and discourage the use of sealed plastic bags。
• periodic inspection: 1 to 2 inspections per month should be conducted throughout the storage period. (c) the timely detection and removal of any seed ball that appears to be soft or moldy to prevent infection。
Summarizing: three parts of the ball, round and round -- the foundation of the flower and then the ball, the key to precise extraction, and the guarantee of proper storage. Following this approach, you will reap not only a few healthy seed balls, but also a strong commitment to the spring of next year。
# lily ball collection #